Key takeaways
- Place your monitor and camera at eye level so viewers get a natural, engaged angle instead of looking up your nose.
- Mount your microphone on a boom arm 4-6 inches from your mouth, slightly off-axis to reduce plosives (“p” and “b” pops).
- Keep your webcam and mic on the same side of the frame as your gameplay overlay to keep viewer eye movement natural.
- Leave at least a few feet of depth behind you for lighting separation and a less flat-looking background.
What's inside
Building a dedicated streaming room is what separates a hobbyist broadcast from a channel that looks and sounds professional. Viewers forgive a lot of things — an occasional dropped frame, a laggy chat — but they rarely stick around for muddy audio, harsh lighting, or a cluttered background that pulls focus from the content. Getting the fundamentals right once means you stop fighting your setup every time you go live.
In this guide, you’ll learn how to choose the right microphone, structure your desk and camera position, control lighting and acoustics, and manage your PC’s resources so streaming doesn’t tank your frame rate. We’ll also point you toward gear that consistently performs well for streamers at different budget levels, starting with the piece of equipment that has the biggest impact on stream quality: your microphone.
As an Amazon Associate we earn from qualifying purchases at no extra cost to you. Product prices and availability are accurate as of the date shown and are subject to change.



🎮 Get More From Your Setup — Free
Prime Gaming gives you free PC games every month, in-game loot, and a free Twitch channel sub — plus fast free shipping on all the gear above. New members get a 30-day free trial.
Watch: How to Set Up a Streaming Room at Home — Video Review
Choosing a Microphone That Matches Your Space
Microphone choice depends heavily on your room, not just your budget. Dynamic microphones, like the FIFINE AmpliGame AM8 or AmpliGame AM8T, are more forgiving in untreated rooms because they reject background noise and echo, making them a strong pick if you’re streaming from a bedroom or shared space. Condenser microphones, such as the Blue Yeti or FIFINE AmpliGame A6T, capture more detail and warmth but also pick up more room noise, so they shine in quieter, slightly treated environments. If you want the flexibility to run either USB or a mixer down the line, look at hybrid USB/XLR options like the TONOR TC310+ or FIFINE AmpliTank K688CT.
Positioning Your Desk, Camera, and Mic
- Place your monitor and camera at eye level so viewers get a natural, engaged angle instead of looking up your nose.
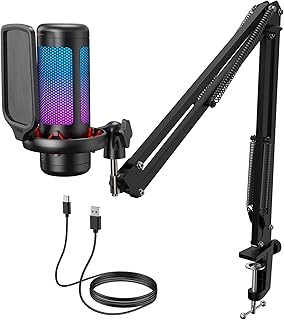
- Mount your microphone on a boom arm 4-6 inches from your mouth, slightly off-axis to reduce plosives (“p” and “b” pops).
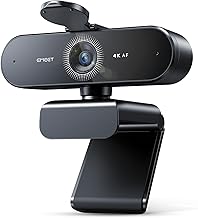
- Keep your webcam and mic on the same side of the frame as your gameplay overlay to keep viewer eye movement natural.
- Leave at least a few feet of depth behind you for lighting separation and a less flat-looking background.
Lighting Your Room for Video
Good lighting doesn’t require a studio budget, but it does require intention. A single key light placed slightly above and in front of you, paired with a dimmer background light or LED strip, adds depth and keeps your face from washing out on camera. Avoid relying solely on overhead room lighting, which tends to cast unflattering shadows under the eyes. If your setup includes RGB accents — many gaming mics and peripherals now include them — keep the color temperature consistent with your main lighting so skin tones don’t shift on camera.
Taming Room Acoustics
You don’t need a fully treated studio, but a few targeted changes go a long way. Soft furnishings — a rug, curtains, or a bookshelf — break up sound reflections that cause that hollow, “boxy” echo viewers notice immediately. If your mic has a mute button or gain knob, like the AM8 or A6T, use it to quickly cut background noise during loud in-game moments and dial in levels without opening software mid-stream. Positioning your desk away from bare walls and windows also reduces reflected noise significantly.
Managing PC Performance While Live
Streaming adds real load to your CPU and GPU on top of whatever game you’re playing. Use your streaming software’s built-in encoder settings to offload encoding to your GPU (NVENC or similar) when possible, which frees your CPU for the game itself. Close background applications, cap your in-game frame rate slightly below your monitor’s refresh rate, and test your bitrate against your actual upload speed before going live — not during your first real stream.
Tips
- Do a 5-minute test stream before every session to check audio levels, lighting, and encoder performance.
- Use a pop filter or a mic with a built-in windscreen to reduce harsh “s” and “p” sounds.
- Keep a headphone jack on your mic (many models include one) so you can monitor your own audio in real time.
- Label your scenes and hotkeys in your streaming software so transitions stay smooth under pressure.
Frequently Asked Questions
Do I need a separate room to stream, or can I use my regular gaming setup?
A separate room isn’t required. Most streamers succeed with a corner of their existing gaming setup as long as they control lighting, reduce echo, and position the camera and mic thoughtfully.
Is a USB microphone good enough, or should I get an XLR setup?
USB is plenty for most streamers and is simpler to set up. Consider XLR, or a hybrid USB/XLR mic, only if you plan to add a mixer or multiple audio sources later.
How much does lighting really affect stream quality?
Significantly. Even an inexpensive key light dramatically improves how viewers perceive your stream’s production value, often more than a webcam upgrade would.
Will streaming hurt my in-game performance?
It can if your PC is underpowered, but GPU-based encoding, closing unnecessary background apps, and a modest frame rate cap usually keep performance smooth on most modern systems.
Conclusion
A great streaming room comes down to a handful of deliberate choices — a microphone suited to your space, thoughtful lighting and camera positioning, basic acoustic control, and a PC configured to handle the extra load — and once those pieces are in place, you can focus on what actually matters: creating content your audience wants to watch.