Key takeaways
- Only download BIOS files from your motherboard maker’s official site, and always confirm the file matches your exact board model.
- Use a UPS or ensure stable power before flashing, since a power loss during the update is the most common cause of a bricked board.
- Use a hardware tool like BIOS Flashback or the in-BIOS updater rather than a Windows-based utility whenever your board supports it.
- Write down your custom BIOS settings beforehand, because the update will likely reset your memory profile, fan curves, and boot order to defaults.
Updating your motherboard BIOS sounds intimidating, but it is a routine maintenance task that can unlock support for new CPUs, fix bugs, improve stability, and enable better memory overclocking. In 2026, most boards make the process straightforward with built-in flashing tools, and many even support updating without a CPU installed. The key is following the steps carefully, because a BIOS update is one of the few PC tasks where interruptions can cause real problems.
This guide walks you through updating your BIOS safely, from deciding whether you actually need to and finding the right file, to flashing it and recovering if something goes wrong. Follow it step by step and you will complete an update with confidence, whether you are enabling a new processor or chasing a stability fix.
Our top picks

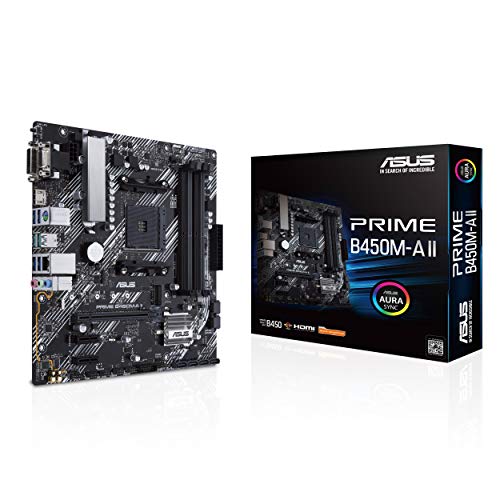
 ASUS TUF Gaming B550-PLUS WiFi II AMD
- Product Group: Personal Computer
- Binding: Personal Computers



As an Amazon Associate we earn from qualifying purchases at no extra cost to you. Ratings are shown as listed on Amazon.
⚡ Save on Your Next PC — Amazon Prime
Prime members get fast free shipping on the systems above, plus early access to Prime Day & Black Friday PC deals. New members get a 30-day free trial.
Watch: How to Update Your Motherboard BIOS — Video Review
Should You Update Your BIOS?
Do not update just for the sake of it. A BIOS update is worthwhile when you need support for a newer CPU, when release notes fix a bug or stability issue you are experiencing, or when it improves memory compatibility for overclocking. Check your current BIOS version in the BIOS itself or with a system tool, then compare it to the latest on your motherboard maker’s website. If your system is stable and you have no specific reason, the old advice holds: if it is not broken, you may not need to fix it.
Finding and Downloading the Correct BIOS File
Go to your motherboard manufacturer’s official support page and locate the exact model, for example an ASUS TUF Gaming B550-PLUS WiFi II or an ASRock B860M Pro A. Download the latest BIOS file, reading the release notes to confirm what it changes and whether any intermediate versions are required first. Only ever use the file for your precise board model, as flashing the wrong BIOS can render a motherboard unbootable. Extract the file and copy it to a FAT32-formatted USB drive.
Using BIOS Flashback and In-BIOS Update Tools
Many modern boards include a dedicated flashing feature. BIOS Flashback, found on boards like the ASUS TUF B550-PLUS WiFi II and ASRock B860 Pro A, lets you update firmware using just the USB drive and power, even without a CPU, RAM, or GPU installed, which is invaluable when a new processor needs a newer BIOS to boot. If your board lacks Flashback, use the built-in in-BIOS updater, often called EZ Flash or Instant Flash, which reads the file from your USB drive directly within the BIOS interface. Avoid updating from within Windows when a BIOS-level tool is available.
Performing the Update Safely
Before flashing, ensure stable power, ideally on a UPS or a desktop that will not lose power, because an interruption mid-update is the main danger. Follow your board’s exact instructions: for Flashback, rename the file if required, insert the USB into the designated port, and press the Flashback button, then wait for the indicator light to finish blinking. For in-BIOS tools, select the file and confirm. Never turn off or restart the PC while the update is in progress. The process usually takes a few minutes, and the system may reboot several times.
After the Update and Recovery Options
Once the update completes, enter the BIOS and reconfigure any custom settings, since updates often reset everything to defaults, including your XMP or EXPO memory profile, boot order, and fan curves. If an update fails and the board will not boot, do not despair: boards with BIOS Flashback can often be reflashed from USB even in this state, and some include dual-BIOS or a diagnostic aid. A BAFOVY PC diagnostic card can help identify where a failed boot is hanging. If all else fails, contact the manufacturer about recovery options.
Tips
- Only download BIOS files from your motherboard maker’s official site, and always confirm the file matches your exact board model.
- Use a UPS or ensure stable power before flashing, since a power loss during the update is the most common cause of a bricked board.
- Use a hardware tool like BIOS Flashback or the in-BIOS updater rather than a Windows-based utility whenever your board supports it.
- Write down your custom BIOS settings beforehand, because the update will likely reset your memory profile, fan curves, and boot order to defaults.
Frequently Asked Questions
Do I really need to update my BIOS?
Only when there is a reason. Update to support a newer CPU, fix a specific bug noted in the release notes, or improve memory compatibility. If your system is stable and you have no such need, updating is optional and best avoided, since every flash carries a small risk.
Can I update the BIOS without a CPU installed?
On many modern boards, yes. Features like ASUS BIOS Flashback and equivalent tools on ASRock boards let you flash firmware using only a USB drive and power, with no CPU, RAM, or GPU required. This is especially useful when a new processor needs a newer BIOS to boot.
What happens if the BIOS update fails or is interrupted?
A failed update can leave the board unable to boot, which is why stable power is essential. Fortunately, boards with BIOS Flashback or dual-BIOS can often be recovered by reflashing from USB. A diagnostic card can help pinpoint the issue, and manufacturers offer recovery support in serious cases.
Will updating my BIOS delete my files or reset my settings?
It will not touch files on your storage drives, so your games and documents are safe. It will typically reset BIOS settings to defaults, however, so you will need to re-enable your XMP or EXPO memory profile and reconfigure boot order and fan curves afterward.
Conclusion
Updating your BIOS is a safe, valuable task when you have a clear reason, whether that is supporting a new CPU, fixing a bug, or improving memory overclocking. The golden rules are simple: use only the official file for your exact board, ensure stable power, prefer a hardware flashing tool like BIOS Flashback, and reconfigure your settings afterward. Follow those steps and you can update with confidence, unlocking new features and stability without the fear the process once carried.